- How do I customize checkout fields in WooCommerce?
- How do I change the checkout field label in WooCommerce?
- How do you customize a field in checkout?
- How do I change the position of WooCommerce error messages on checkout page?
- How do I remove a checkout field in WooCommerce?
- How do I create a custom field in WooCommerce?
- How do I customize my checkout page in Shopify?
- How do I edit my WooCommerce account?
- How do I add a custom field in WooCommerce checkout without plugin?
- How do I add a custom field to a WooCommerce invoice?
- How do I change my billing information on WooCommerce?
How do I customize checkout fields in WooCommerce?
The Checkout Field Editor extension allows you to add and remove checkout fields, or update the type, label, and placeholder value with a few clicks. You can also mark each checkout field as “required” or “not required.” When adding a new field, you can choose from the following types: Text – standard text input.
How do I change the checkout field label in WooCommerce?
Here's a super quick snippet you can use to rename the WooCommerce checkout “state” field label for both billing & shipping.
...
If you want to rename other fields, just replace 'state' inside the square brackets with:
- 'country'
- 'first_name'
- 'last_name'
- 'company'
- 'address_1'
- 'address_2'
- 'city'
- 'postcode'
How do you customize a field in checkout?
Create conditional fields
In your WordPress dashboard, go to WooCommerce > Checkout > Billing and click Add New Field. Select the type of field you want to create and fill in the label, placeholder/type, and description. This will depend on the type of conditional you're creating.
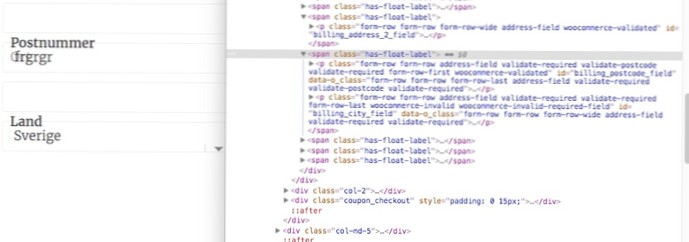
How do I change the position of WooCommerce error messages on checkout page?
To edit the location of the checkout errors you must do the following:
- Set SCRIPT_DEBUG constant to true, do it in the wp-config. php file define('SCRIPT_DEBUG', true);
- Locate the checkout. js script in the woocommerce/assets/js/frontend.
- Locate wc_checkout_form. $checkout_form. ...
- Change it to wc_checkout_form.
How do I remove a checkout field in WooCommerce?
Go to the WooCommerce tab in your WordPress dashboard. Click on Checkout and then on the Billing tab. You'll see a list of all the fields you can hide so just activate the disable option on the field you want to remove. After that, you can go to the Shipping and Additional tabs and disable the fields you want to delete ...
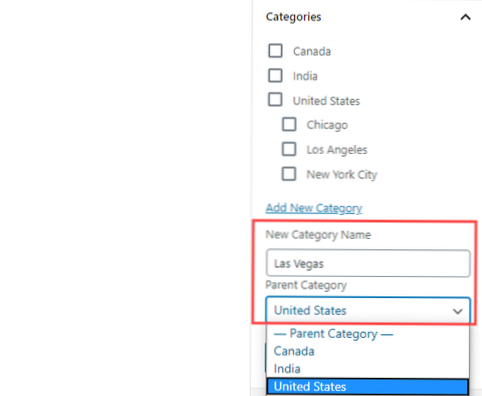
How do I create a custom field in WooCommerce?
It's easy to add a custom field to a product in WooCommerce:
- Go to the product where you'd like to add a custom field.
- In the Product Data section, click the Product Add-Ons.
- Click 'Add Group' then click 'Add Field'
- Choose the type of field you'd like to add from the 'Field Type' option.
How do I customize my checkout page in Shopify?
From the Shopify app, go to Store > Settings. Under Store settings, tap Checkout.
...
Under Store settings, tap Checkout.
- In the Style section, click Customize checkout to open the theme editor.
- In the BANNER section, click Upload image, or select an image that you have already uploaded to your library.
- Click Save.
How do I edit my WooCommerce account?
3. WooCommerce “My Account” Customization Plugins (premium)
- you can switch between “sidebar” or “tab” display modes.
- you can sort, remove, add, rename and change the content of the account management tabs.
- you can show certain tabs to specific user roles.
- you can change colors, labels, add icons.
How do I add a custom field in WooCommerce checkout without plugin?
How to Add Custom Fields to WooCommerce Checkout Page
- Step 1: Define an Array of Fields on Checkout Page. ...
- Step 2: Add Custom Fields to WooCommerce Checkout Page. ...
- Step 3: Concatenate Fields as per Requirement. ...
- Step 4: Display Custom Fields on Order Page. ...
- Step 5: Display Fields on Account Page.
How do I add a custom field to a WooCommerce invoice?
Go to WooCommerce > Invoice/ Packing > Invoice from WordPress dashboard.
...
Add product attribute
- From the product attribute, click the Add/Edit Product Attribute button.
- Into the popup that appears, from Add New tab section, key in with field name and the respective meta key.
- Then, click on the Save button.
How do I change my billing information on WooCommerce?
//Change the Billing Details checkout label to Contact Information function wc_billing_field_strings( $translated_text, $text, $domain ) switch ( $translated_text ) case 'Billing Details' : $translated_text = __( 'Contact Information', 'woocommerce' ); break; return $translated_text; add_filter( 'gettext', ' ...