- How do I add a custom field in variation WooCommerce?
- How do I add a custom text field to the product page in WooCommerce?
- How do you add custom fields to WooCommerce products and subsequently through the order cycle?
- How do I create a custom field in WooCommerce?
- How do I do variations in WooCommerce?
- How do you use input fields in WooCommerce?
- How do I create a custom field value in WooCommerce?
- How do I add custom data to WooCommerce?
- How do I customize a WooCommerce checkout form?
- How do I create a custom field in checkout?
- How do I add a custom field in WooCommerce checkout without plugin?
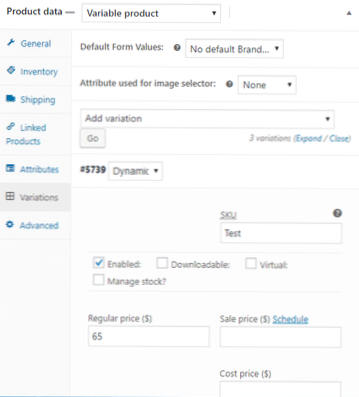
How do I add a custom field in variation WooCommerce?
To add our variation-specific custom fields, go to the Product Add-Ons tab in the Product data section. Click 'Add Group' then 'Add Field'. In the 'Field Type' setting, choose 'Information'. In the screenshot above, you can see the Product Add-Ons panel.
How do I add a custom text field to the product page in WooCommerce?
It's easy to add a custom field to a product in WooCommerce:
- Go to the product where you'd like to add a custom field.
- In the Product Data section, click the Product Add-Ons.
- Click 'Add Group' then click 'Add Field'
- Choose the type of field you'd like to add from the 'Field Type' option.
How do you add custom fields to WooCommerce products and subsequently through the order cycle?
1 Answer
- Display a custom field on admin product under inventory tab.
- Display a custom field on admin product under variations tab for each variation.
- Save the custom field value for products and product variations.
- Display the custom field value on single product pages (also for each selected variation)
How do I create a custom field in WooCommerce?
How to create WooCommerce custom fields with the Advanced Custom Fields plugin
- Log into WordPress and find Plugins > Add New. ...
- Click 'Custom Fields' on the left hand side of the WordPress dashboard.
- Click the 'Add New' link by the 'Field Group' at the top of the page.
- Next, you'll see the 'Add New Field Group' page:
How do I do variations in WooCommerce?
Displaying product variations in WooCommerce requires just four steps:
- Create a variable product.
- Add product attributes (such as size and color).
- Generate your variations, so that each one has a unique SKU number (and price if applicable).
- Preview and publish your variable product.
How do you use input fields in WooCommerce?
Installation
- Upload the entire plugin folder to the /wp-content/plugins/ directory.
- Activate the plugin through the “Plugins” menu in WordPress.
- Start by visiting plugin settings at “WooCommerce > Settings > Product Input Fields”.
How do I create a custom field value in WooCommerce?
Enter the name and value text of your choice and click on Add Custom Field button. After adding the custom field it will be listed under custom fields: Save the changes by clicking on Update button. Now, if you'll go to product page you'll not see custom field value there yet.
How do I add custom data to WooCommerce?
- Step 1: Add Data in a Custom Session, on 'Add to Cart' Button Click. ...
- Step 2: Add Custom Data in WooCommerce Session. ...
- Step 3: Extract Custom Data from WooCommerce Session and Insert it into Cart Object. ...
- Step 4: Display User Custom Data on Cart and Checkout page. ...
- Step 5: Add Custom Data as Metadata to the Order Items.
How do I customize a WooCommerce checkout form?
Setup and Configuration
- Go to: WooCommerce > Checkout Fields.
- There are three sets of Fields you can edit:
- Select the Add Field button.
- Enter your text and preferences.
- Save Changes.
How do I create a custom field in checkout?
To add custom fields to WooCommerce checkout, select the field type in Add New Field section, enter a label name and click on Add Field.
- And it's done! ...
- Here you can enable or disable a field (even the WooCommerce default ones), or set it as required. ...
- In the Appearance tab, you can set Placeholder and CSS Class.
How do I add a custom field in WooCommerce checkout without plugin?
How to Add Custom Fields to WooCommerce Checkout Page
- Step 1: Define an Array of Fields on Checkout Page. ...
- Step 2: Add Custom Fields to WooCommerce Checkout Page. ...
- Step 3: Concatenate Fields as per Requirement. ...
- Step 4: Display Custom Fields on Order Page. ...
- Step 5: Display Fields on Account Page.